2.27.2017

February 2017 Project Life and A Layout *Hip Kit Club*

Hello, crafty friends!

I hope everyone had a wonderful weekend and is having an even better Monday! I have two projects to share with you today that I created using the lovely February 2017 Hip Kits from Hip Kit Club...


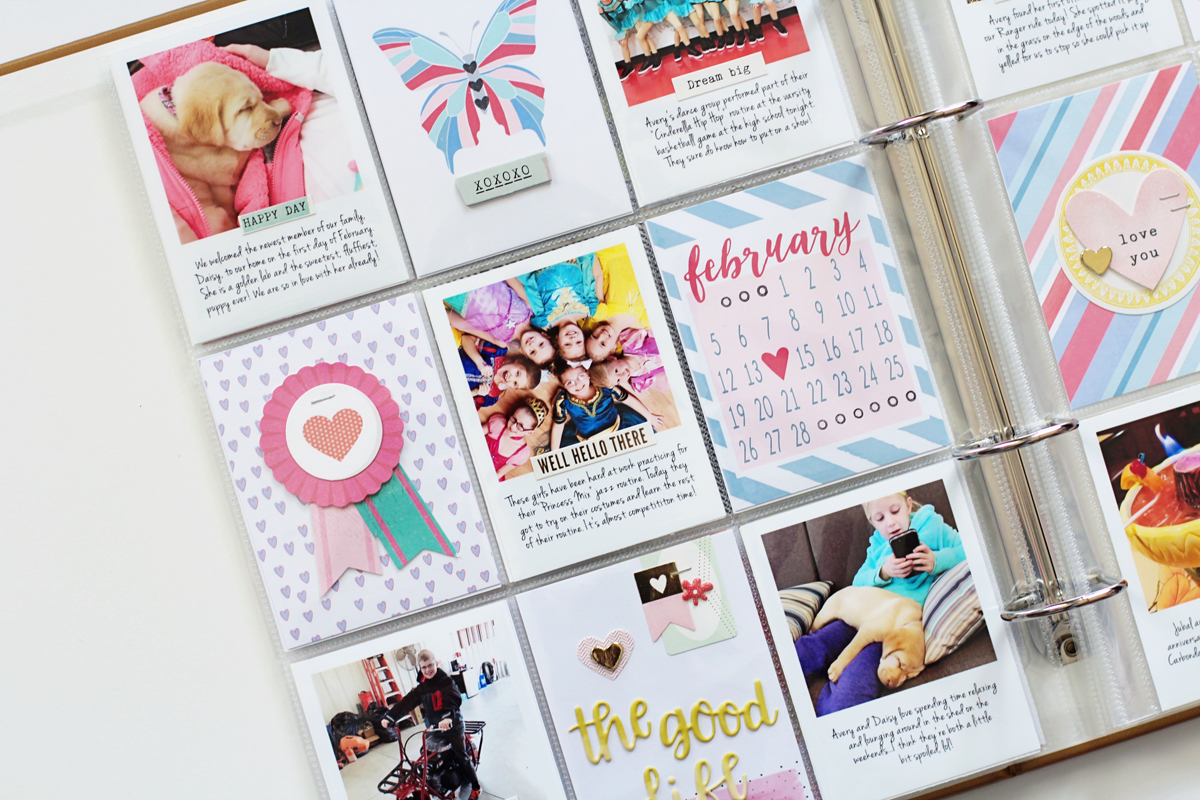
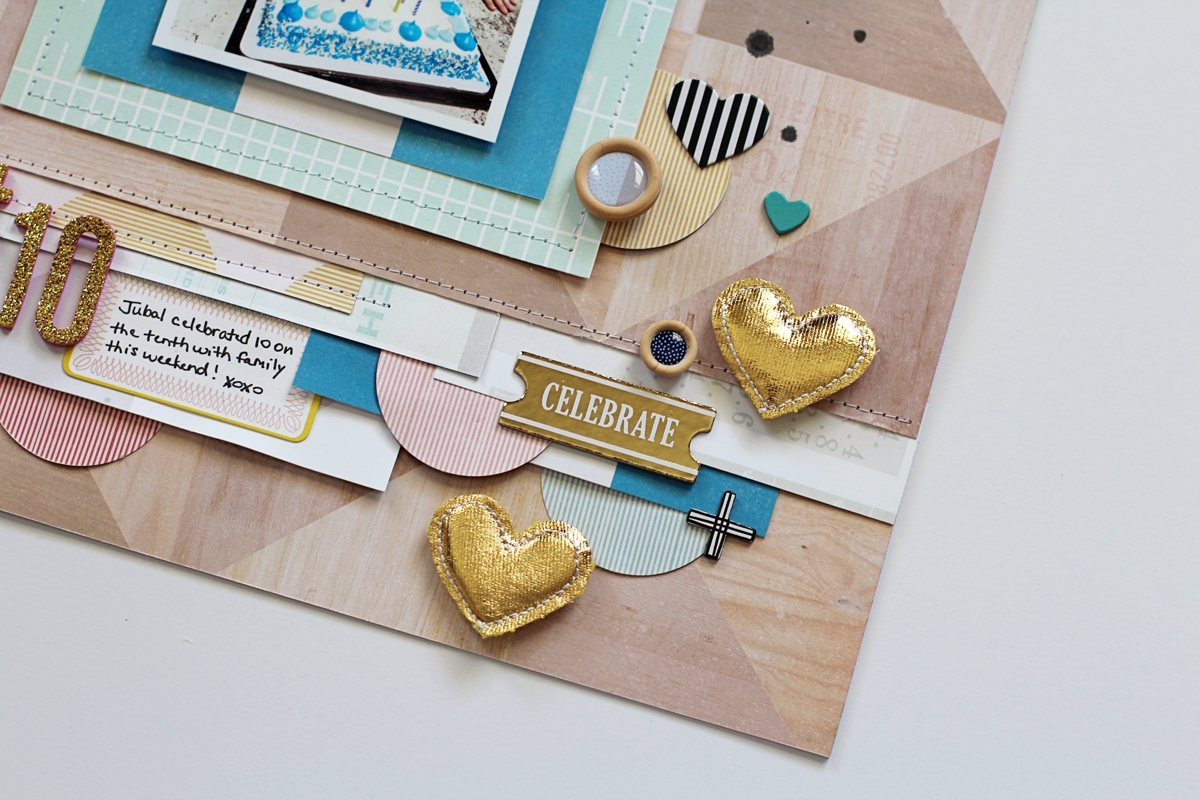
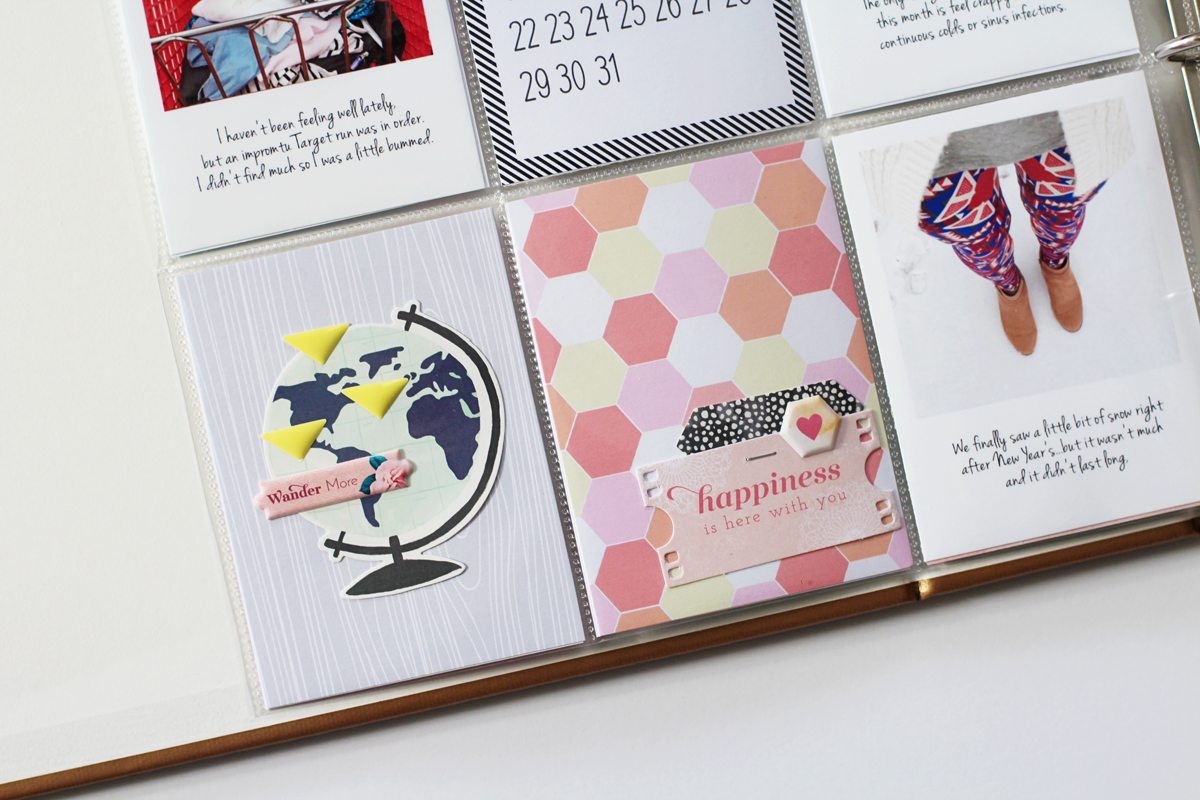
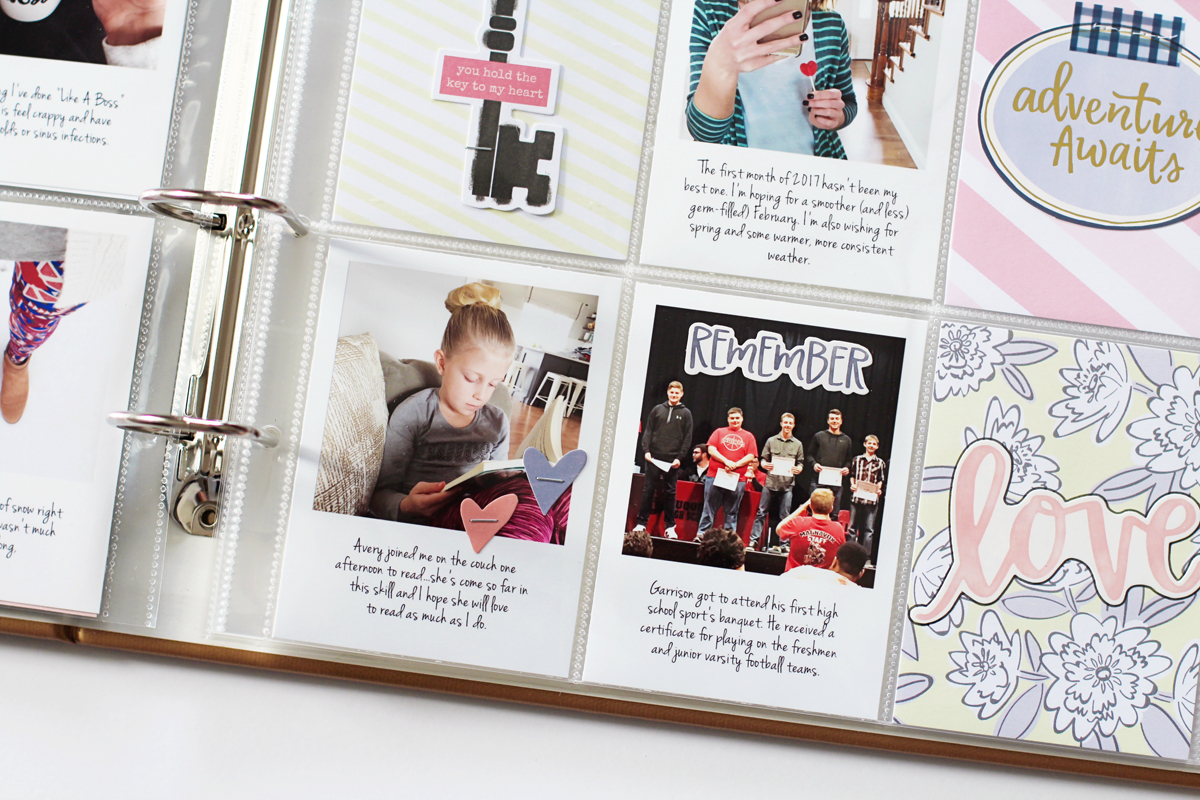
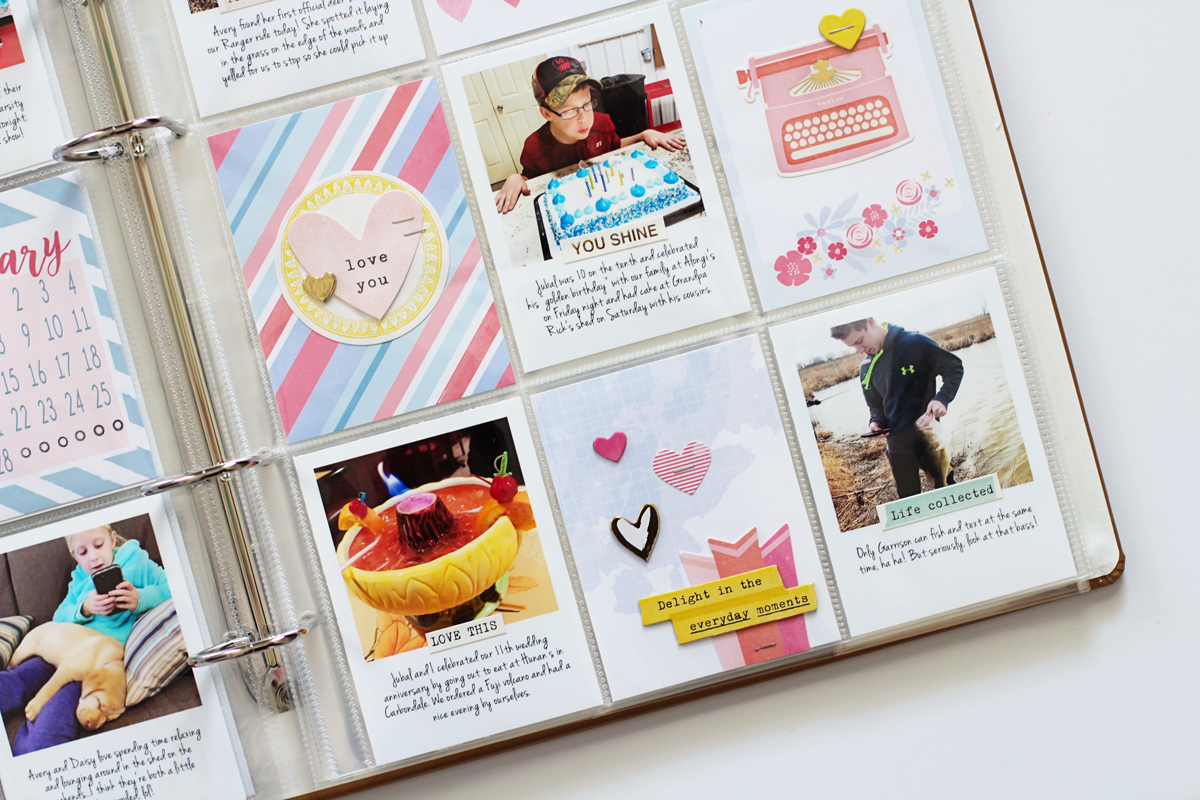
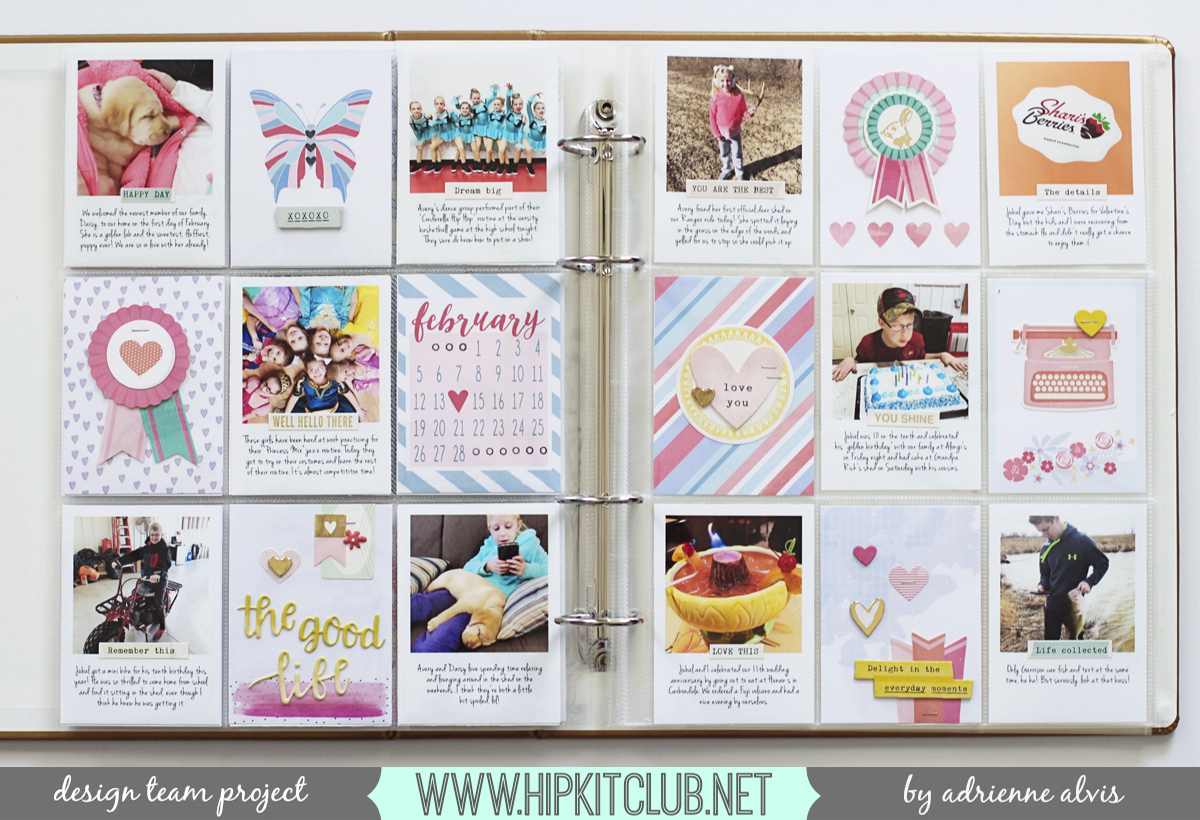
First up is my Project Life spread for February...


I used the February 2017 Project Life Kit and embellished the exclusive journaling cards using items from Pink Paislee and Crate Paper.


I kept my embellishing to a minimum and layered the sentiment stickers from Pink Paislee directly on top of my photos.


Here's the full spread for the month of February...


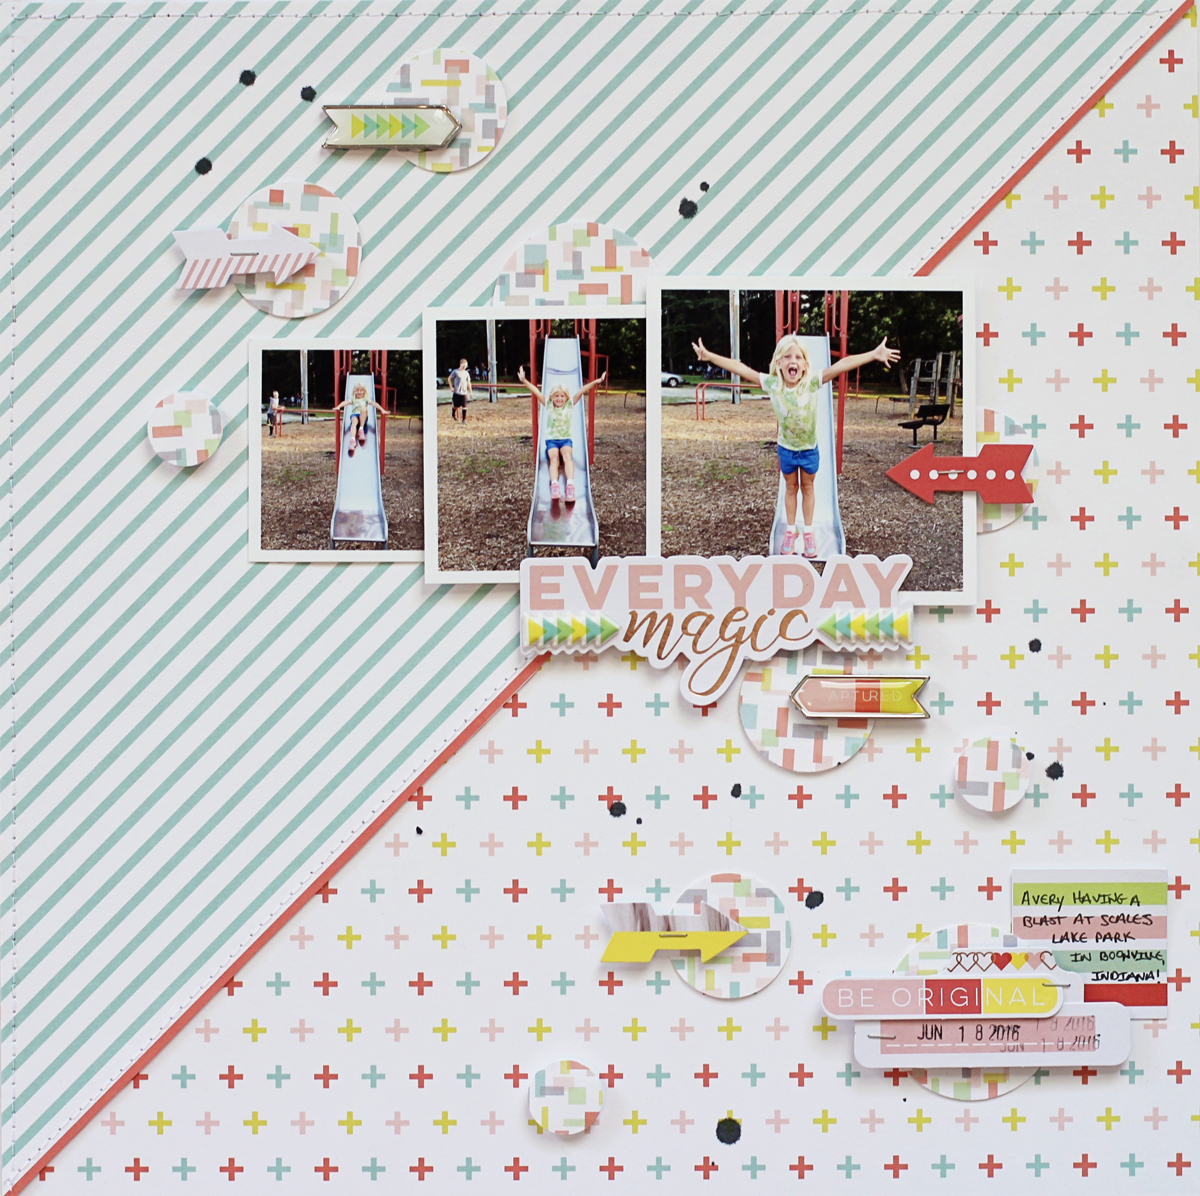
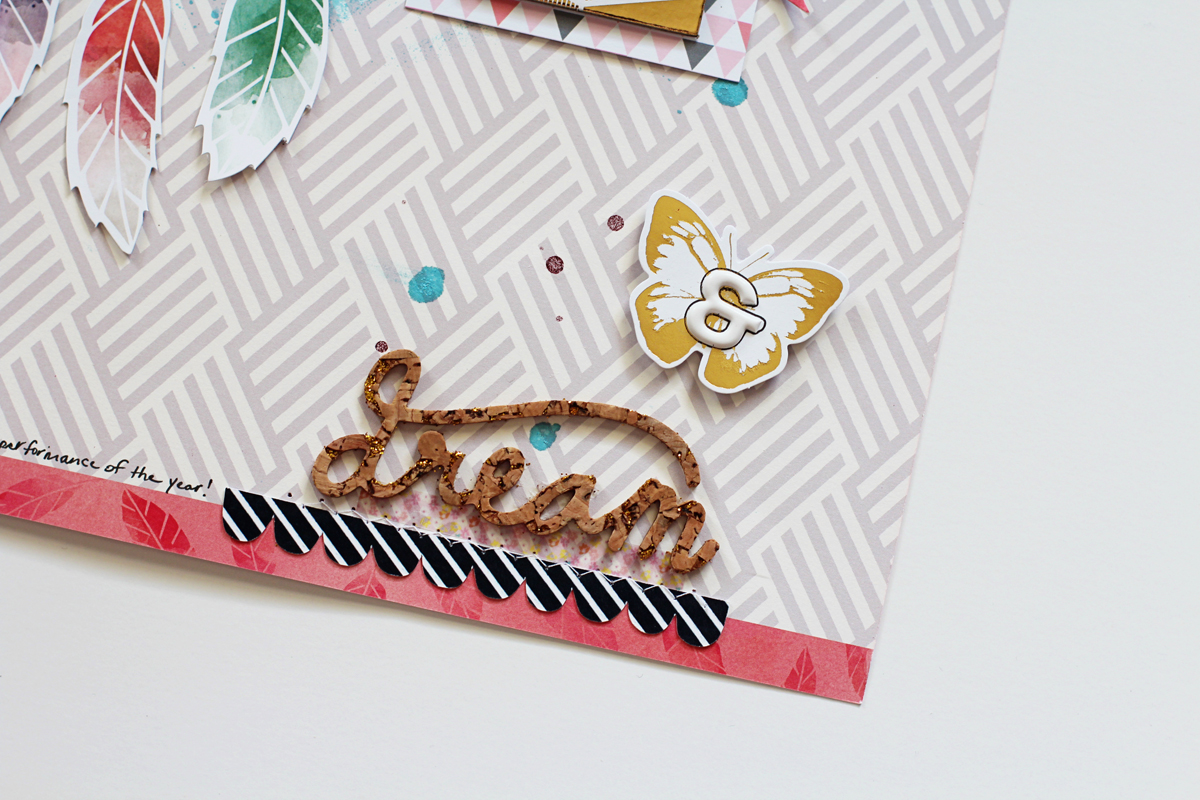
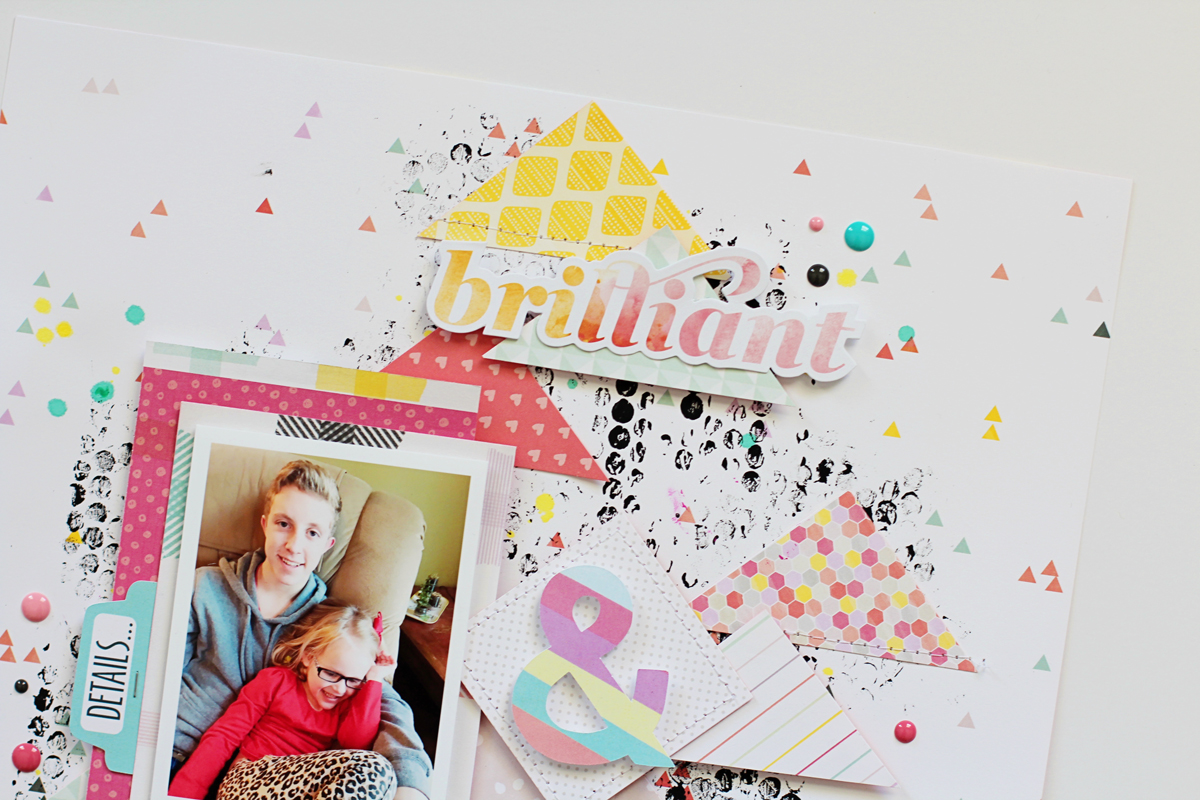
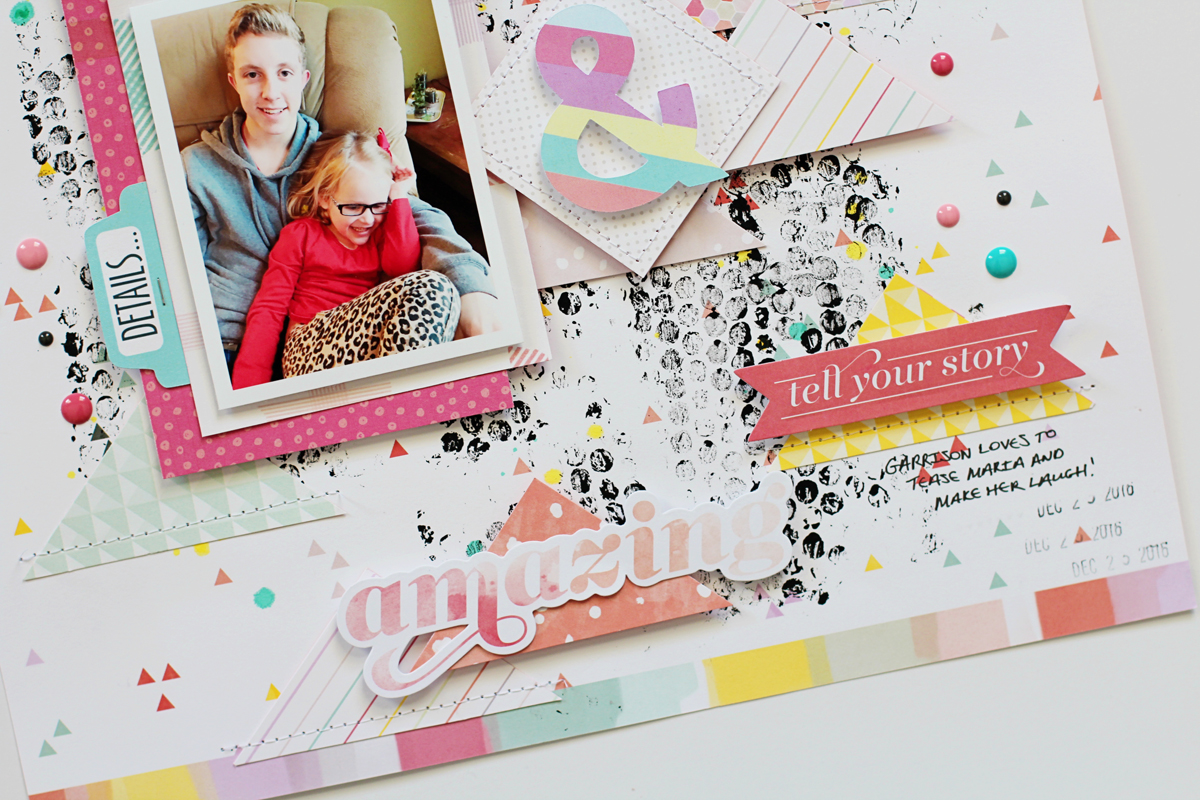
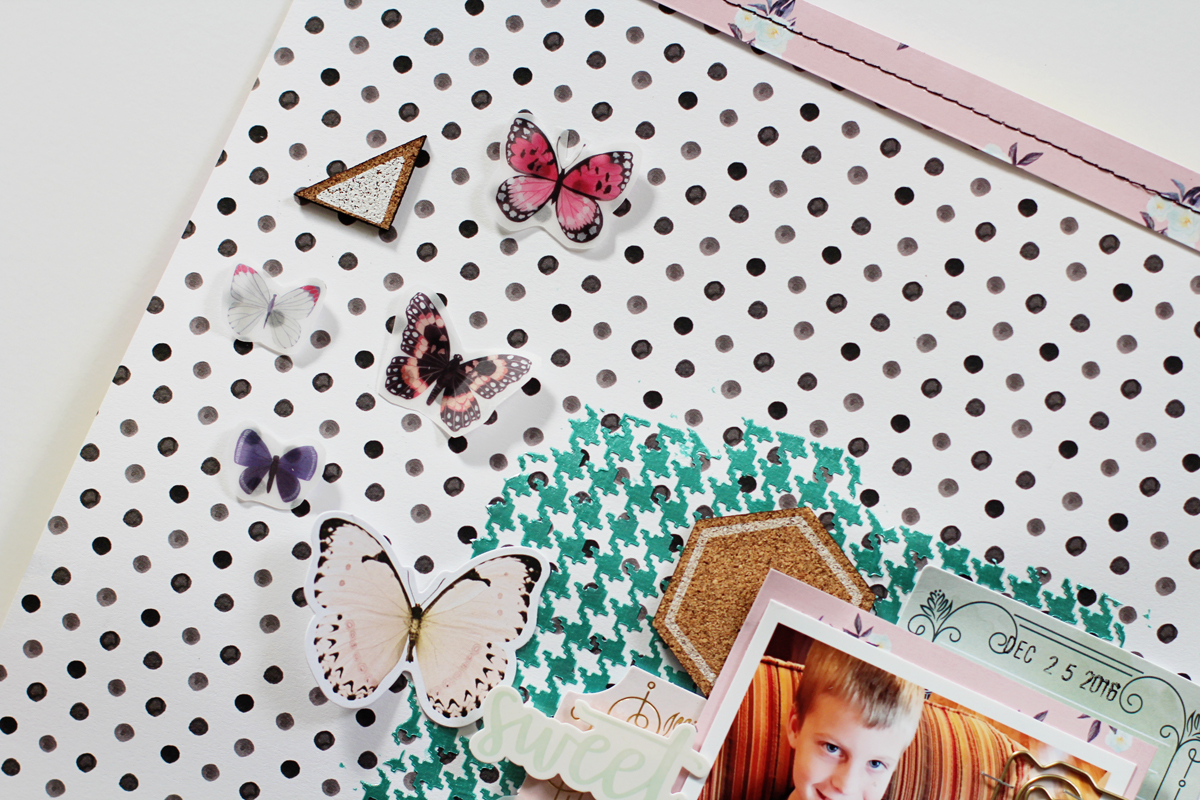
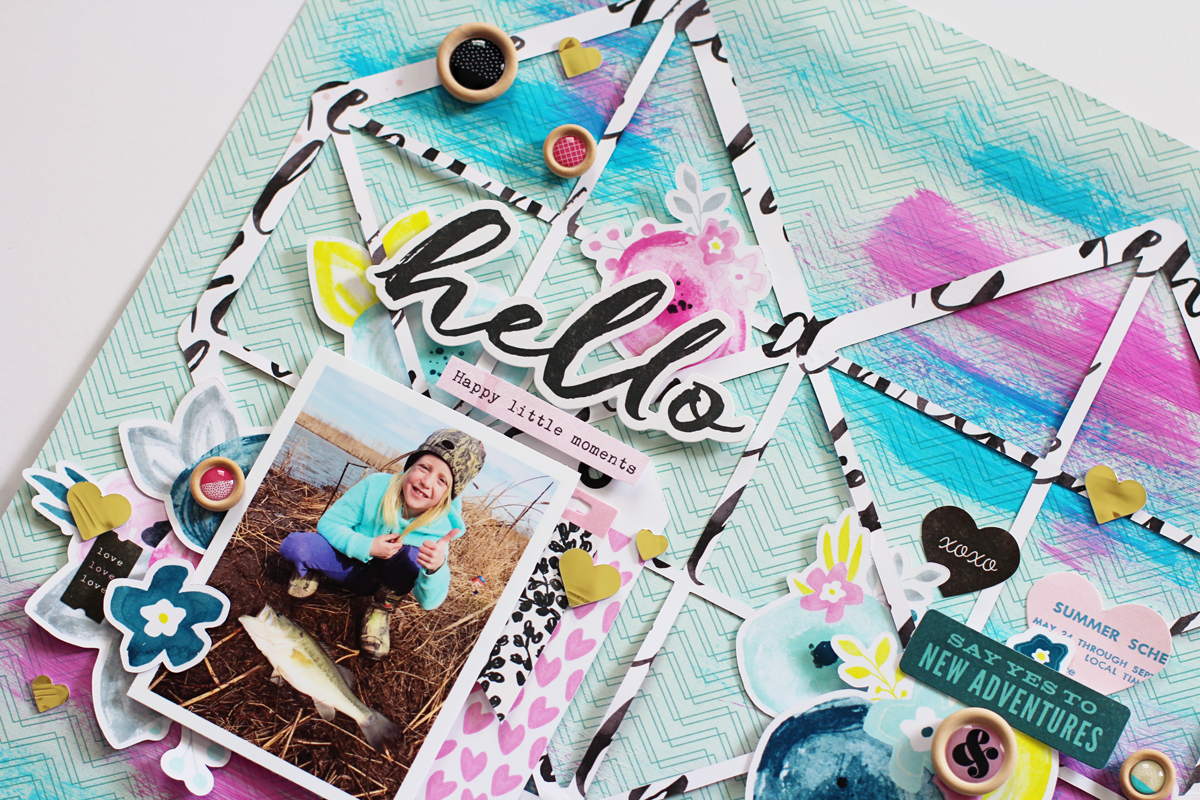
Next, I have a layout that I created using the February Kits and one of this month's exclusive cut files (and free to subscribers!) that you can find here.


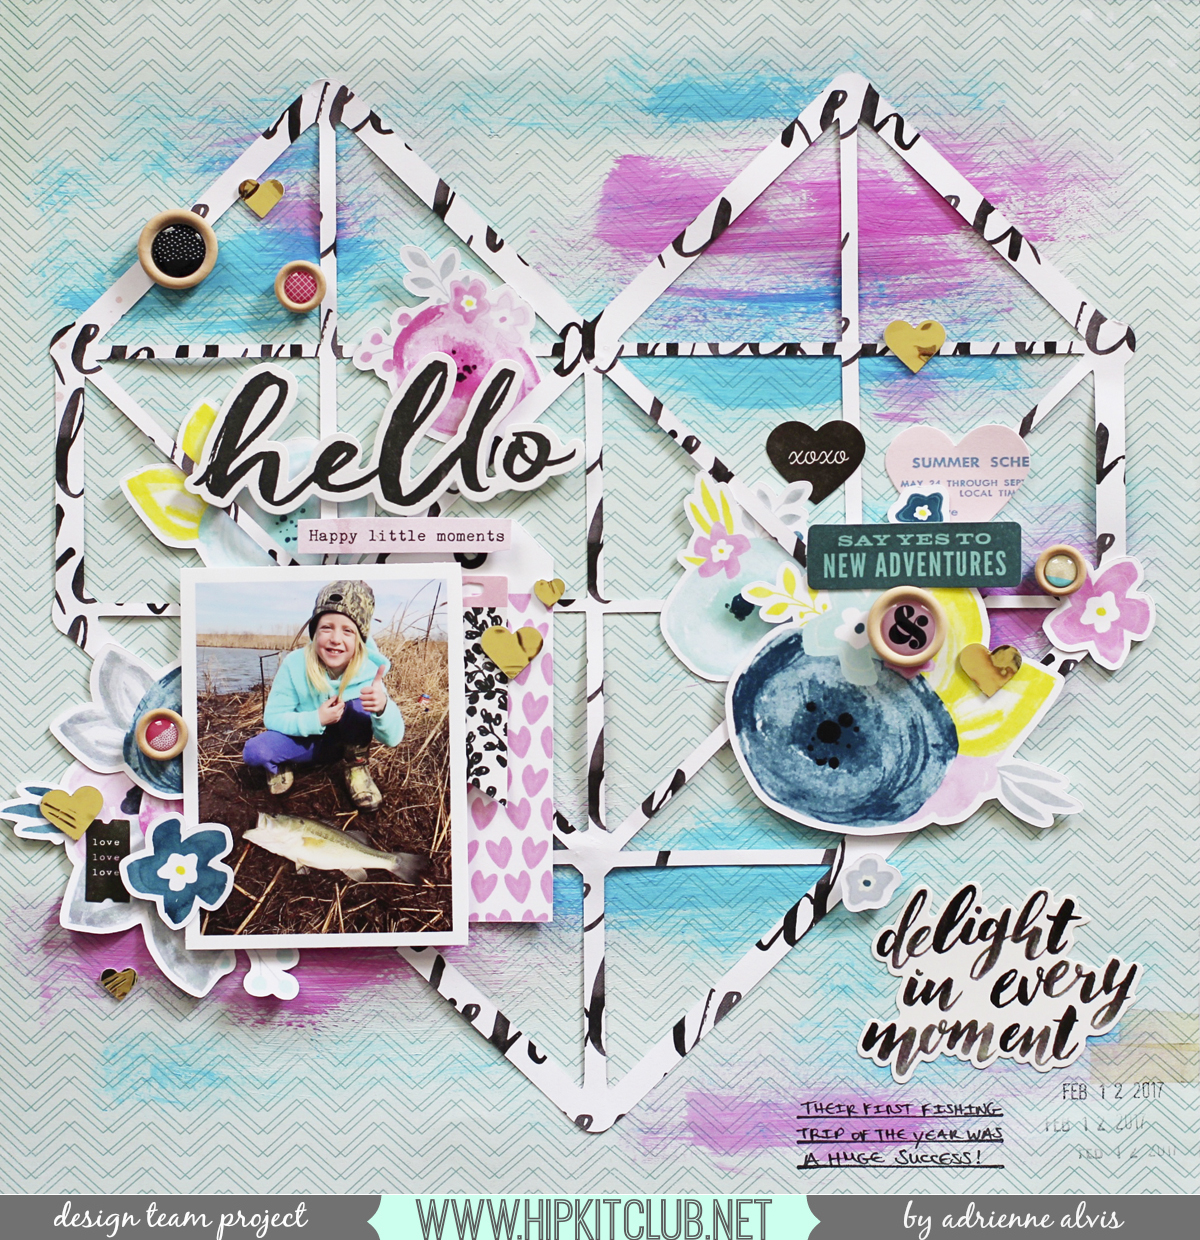
I have a process video at the end of this post that you can view to see how this page came together.


I just wanted to say that this is my last project for Hip Kit Club. Sadly, I've decided not to renew my term and it was a very hard decision to make because HKC is seriously the best! I have decided to follow some signs and my heart and venture out to pursue some other interests. I'm still going to continue to scrapbook and I'm still on a couple of other DT's, but my life as a parent and wife are evolving and I'm needing more time to fulfill these priorities. I just want to say that I've enjoyed EVERY project that I created using the amazing Hip Kit Club kits and that Kimberly is the kindest, sweetest person that I've ever designed for. I wish the new team all the best and will continue to follow them and use their amazing products.


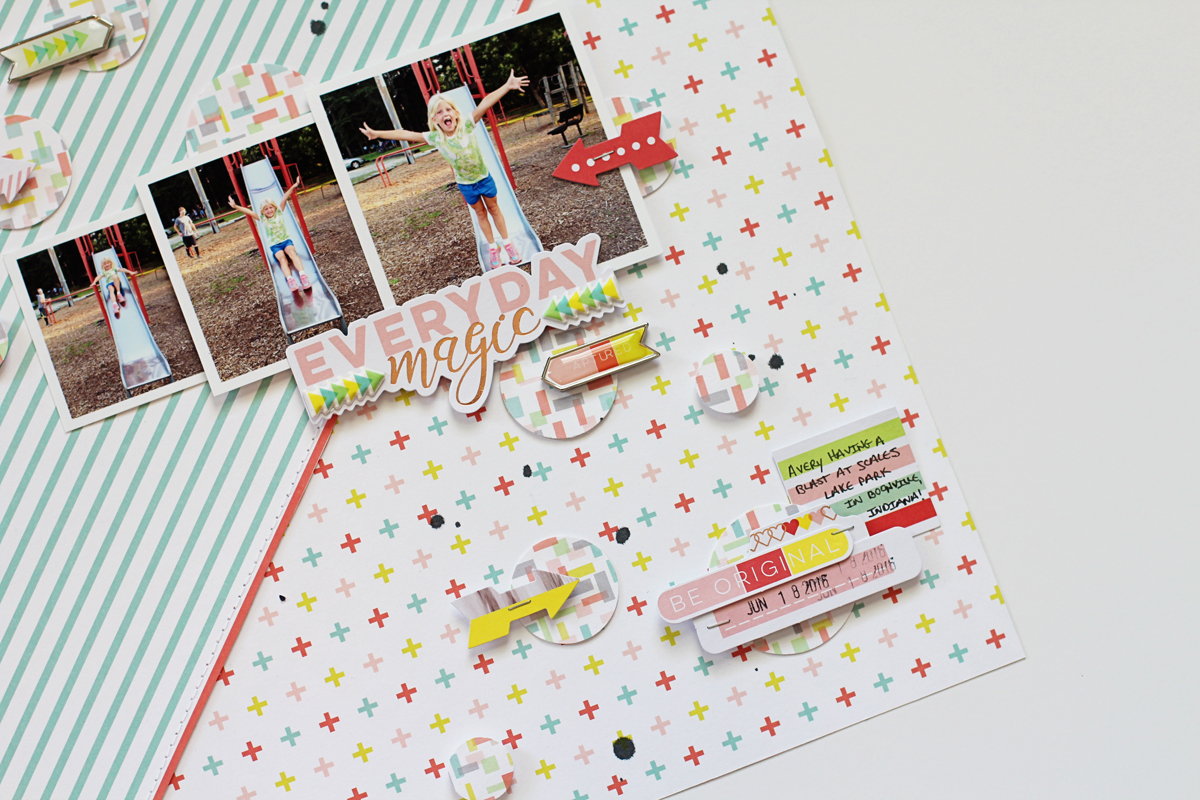
And here's the process video for my layout above...


Thanks so much for joining me today and I hope you have a fabulous afternoon!

2.22.2017

Everyday Magic *Pinkfresh Studio*

Hello, crafty friends! 

I shared this layout that I created using the gorgeous new Live More collection on the Pinkfresh Studio blog last week...


I chose to use several patterned papers for this page including the lovely aqua striped and plus sign patterned papers. I cut the papers diagonally and layered them both on top of a piece of cardstock before I stitched them down on my page using my sewing machine.


I used a few circle punches and a piece of patterned paper from the 6x6 paper pad (also from the Live More collection) and adhered them to my layout using some foam adhesive dots so that they look more dimensional. I placed several of the arrow die cut pieces from the collection around my page as well and added the "Everyday magic" sentiment underneath my photos for my title. 


I placed a couple of the puffy stickers from the Live More collection directly onto the "Everyday magic" sentiment for added dimension. I also layered a few of the paperclips from the collection on some of the punched circle elements to give my page a little more texture. I also wrote my journaling on a few of the die cut pieces and clustered them together toward the bottom of my layout. 


I hope I've given you some inspiration to use the Live More collection to create an amazing layout for yourself! 

Thanks for joining me and I hope you have a fabulous day!

2.20.2017

Serious Puppy Love *Shimmerz Paints*

Hello, everyone! 

I'm here today with a layout that I shared on the Shimmerz Paints blog a couple of days ago. I created this page using LOTS of Coloringz spray ink and a little bit of Dazzlerz dimensional paste...


To begin, I used the negative piece of a heart cut file that I had in my stash and adhered it to another piece of white cardstock using a few pieces of washi tape. I placed it in a shallow box so the overspray from the Coloringz didn't go all over my craft room!


Next, I chose five colors of Coloringz spray ink in Heidi Ho Blue, No Yoking, Oh Say Can U Sea, Don't Citron Me, and Pretty In Pink and randomly spritzed them all over the cardstock. I also blotted off some of the excess spray using a paper towel before I removed the stencil. 


Please forgive me because I totally forgot to snap a photo of what the bottom piece of card stock looked like when I was done! Lol! But, I ended up fussy-cutting the hearts out of the paper after the spray ink had dried. You can see below that I used them to create embellishment clusters around my page...


Before I added the embellishments and photos on my layout, I lightly dry-brushed some Dazzlerz dimensional paste in Tutti Frutti, which is a lovely light pink, onto the patterned paper that I chose to use for my background. I also splattered a few ink spots around my layout using some Punked Up Purple and Pretty In Pink Coloringz to coordinate with my overall color scheme.


I also punched out smaller hearts using some of the coordinating blue and white striped patterned paper that I used on my layout and placed them around the hearts that I created with the Coloringz for added dimension and contrast. 


I really love how this page turned out and I loved how easy it was creating some fun, fussy-cut embellishments from just a little bit of spray ink and cardstock! 

Thanks so much for joining me and I hope you have a great day!


2.19.2017

You're Golden! *Hip Kit Club*

Hello, crafty friends!

I'm here today with a masculine layout that I shared on the Hip Kit Club blog last Friday. I created this page using the February 2017 Main Kit only...


My youngest son turned 10 on February 10th, so I was really excited to document his special golden birthday!


I had just received my February kits so I challenged myself to create a masculine layout using the Main Kit only and I must say I love how it turned out!


I began by taking the Spring Break patterned paper from the Oasis Collection by Crate Paper and cutting it into thirds. I placed the middle strip down my page vertically and adhered it to a piece of white card stock, but you can't tell that from my completed layout because I changed my design halfway through my process (and you can see how that happened in my process video at the end of this post). I layered different strips of patterned paper from the Oasis Collection by Crate Paper along the edges of the middle strip and used my sewing machine to stitch around the edges.


It wasn't until I was trying to figure out my title placement, which I created using the lovely gold glitter Thickers from the Main Kit, that I decided to turn my page 180 degrees and go about my design horizontally instead of vertically. I used some of the Shimelle wooden buttons and Maggie Holmes Chasing Dreams gold foil Thickers to create small embellishment clusters around my page. I also added three of the puffy hearts from the Maggie Holmes Chasing Dreams Collection for even more texture and dimension. They were so fun to use and are some of the cutest embellies that I've seen in a long time!


I journaled on one of the Maggie Holmes Chasing Dreams Collection ephemera pieces and tucked it under one of the smaller strips of patterned paper at the bottom of my layout. Be sure and check out my process video below to see how my whole page came together and how I altered it halfway through.


Thanks for stopping by and I hope you have a great weekend!
 

2.12.2017

Shine Bright & Dream *Hip Kit Club*

Hey everyone!

I shared this layout on the Hip Kit Club Facebook page this past Friday...


I used the January 2017 Hip Kits to create this page and I also added a cut file from this month that's available here and free to subscribers!


I altered the dreamcatcher cut file a bit and duplicated it so I could layer it underneath the "Shine Bright" ephemera piece from Pink Paislee. I also added the feathers underneath so it also resembled a dreamcatcher.


The gold glitter cork stickers from the Pink Paislee Moonstruck collection were a wonderful touch and added a little more texture and dimension to my page. The painted cork pieces from 1 Canoe 2 also coordinated well with my overall page design and color scheme.


I also have a process video for this layout for you to watch so I hope you enjoy a little peek into my design process...


Thanks so much for dropping by and I hope you have a great day!

2.10.2017

Brilliant & Amazing *Shimmerz Paints*

Hi everyone! 

I shared a fun and colorful layout on the Shimmerz Paints blog yesterday that I created using some of the new AcriTonez paints and some gorgeous Coloringz spray ink!


To begin, I dry brushed some AcriTonez self-priming acrylic paint in Shimmerz Tar, Tar onto a small piece of bubble wrap packaging to create my background for my layout.


I also added some Coloringz spray ink in Oh Say Can U Sea and No Yoking to my background to create even more color pop on my page.


After all the paint dried, I layered my photo and lots of small triangles in a vertical design down my page. I created contrast and dimension by placing some foam adhesive dots on some of the triangles and machine stitched a few down as well.


I also added several die cut pieces from Hip Kit Club and Pink Paislee to complete my page.

I have a process video to go along with this page below so I hope you'll check it out! Have a fabulous day!


2.07.2017

Stories Of Today *Pinkfresh Studio*

Hi crafty friends!

I shared this layout on the Pinkfresh Studio blog last week...


I used their new collection, The Mix No.1, to create this layout. I also used a cut file from Hip Kit Club and one of the lovely patterned papers from the Dream On collection.


The Mix No. 1 collection is filled with lots of lovely embellishments that are staples for your stash. They go with everything and are perfect for adding a little trendiness and style any project! 


I layered lots of the die cuts from the collection around the photos of my daughter and placed several of the enamel stickers around my page as well. The enamel stickers come in several different colors and shapes including hearts, stars, and chevrons. 


Be sure and check out my full post on the Pinkfresh Studio blog!


Thanks so much for joining me today! 

2.05.2017

Using Rub-ons and Documenting 2017 *Hip Kit Club*

Hello, everyone! 

I have two projects that I shared on the Hip Kit Club blog this past Friday. First up, I have my Project Life spread for January 2017 that I created using items from the January 2017 Project Life Kit...
 

I'm going to continue to use a 9x12 album for my spreads this year and I'm also sticking to a monthly documenting schedule. I printed my photos off from my home computer and placed them in the various 3x4 slots to begin my process.


I used several of the HKC exclusive Project Life cards from the January 2017 Project Life Kit and layered a few of the 1 Canoe 2 Hazelwood Gold Foiled Icon stickers on a few of my photos to add some dimension without adding a lot of bulk to the pockets.


I also layered a few of the Pink Paislee Moonstruck ephemera pieces (available in the January 2017 Main Kit) on a couple of the journaling cards and layered some puffy stickers on top of them. I really love the colors of the journaling cards this month, don't you?


I kept the right side of my spread cohesive with the left by using the same color scheme and by placing my embellishments on the journaling cards in a visually balanced design.


And here's a look at my full spread for January 2017...


Next up, I have a layout that I created using the January 2017 Hip Kits to share...


I was really inspired by the lovely butterfly rub-ons from 1 Canoe 2, but I wanted them to look more dimensional on my layout so I placed them on a piece of vellum and fussy-cut them out. I also carefully bent their wings up a bit so they would look as if they were fluttering across my page.


I also used the 6x6 stencil from Carta Bella and the Heidi Swapp Metallic Texture Paste in Teal from the January 2017 Color Kit to create the houndstooth design on the background patterned paper from 1 Canoe 2.


I layered lots of the ephemera pieces from the Pink Paislee Moonstruck collection around my photo and placed several of the 1 Canoe 2 Hazelwood Printed Cork Shape pieces (available in the January 2017 Project Life Kit) on my page for a little color and texture contrast.


Be sure and check out the process video for this layout below... 


Thanks so much for stopping by today and I hope you have a wonderful day!